Troubleshooting
Light My Bricks lighting kits contain individual components that are very small and can be easily damaged if not handled correctly.
To prevent unnecessary damage to components, we highly recommend that the User Guide section, "Important Things To Note" is read carefully. Follow the handling procedures in the User Guide to help prevent faults and damages to your Light My Bricks components.
If you are experiencing issues with your Light My Bricks set, watch our troubleshooting video below or read on for a list of common causes to help you troubleshoot.
CHECK YOUR BATTERIES
Firstly, ensure that the batteries have power using a battery charge gauge.
If the batteries have no power, replace the batteries.
If the batteries still have power, check to see if the batteries have been inserted correctly into the battery pack.
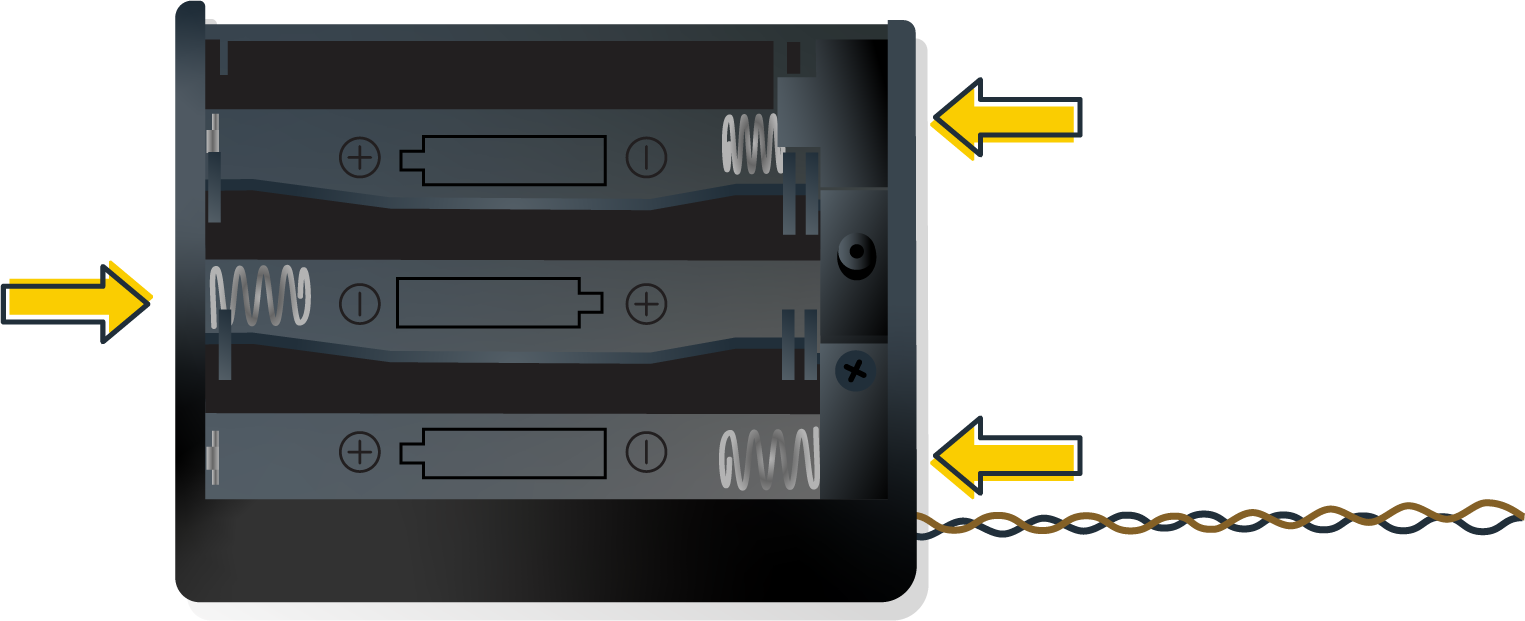
FOR AA BATTERIES USING THE AA BATTERY PACK
Inside the battery pack are symbols indicating which direction the AA battery should be inserted. The flat side of the battery should be paired with the spring side of the battery pack.
If the batteries have been installed correctly and your kit still isn’t operating correctly, the next step is to check the wiring.
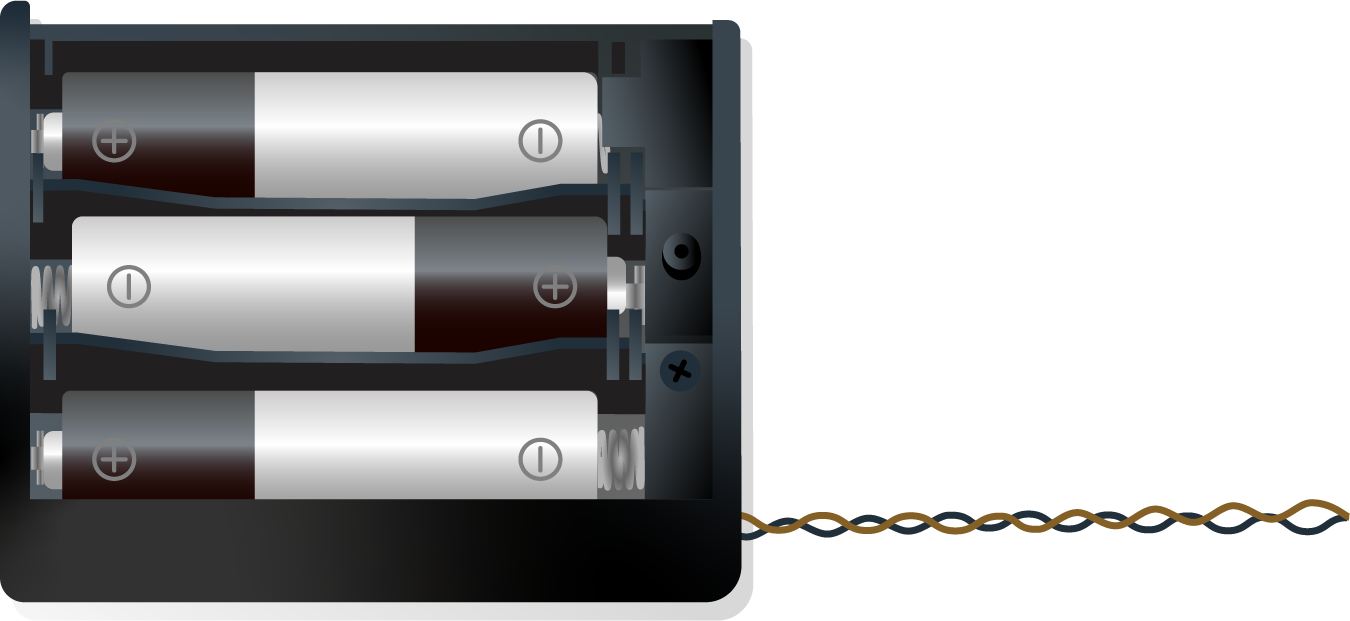
AA Battery Pack
Correct Installation:
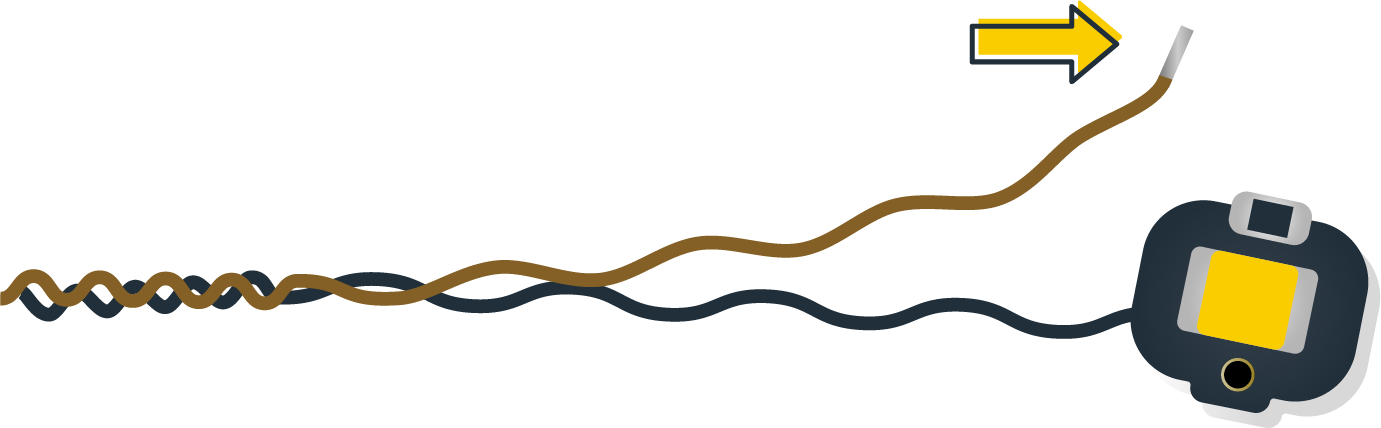
CHECK YOUR WIRES
In order for Light My Bricks components to fit in between and underneath LEGO® bricks, the components need to be very small.
Due to this nature, Light My Bricks components can be easily damaged when not handled correctly.
Be careful when removing unpacked components out of the packaging and ensure not to forcibly pull at the wires as this can damage the soldering that attach the wires to the LEDs.
If the wiring is detached from the LED itself, the light will not operate.
Detached Wire
Attached Wire

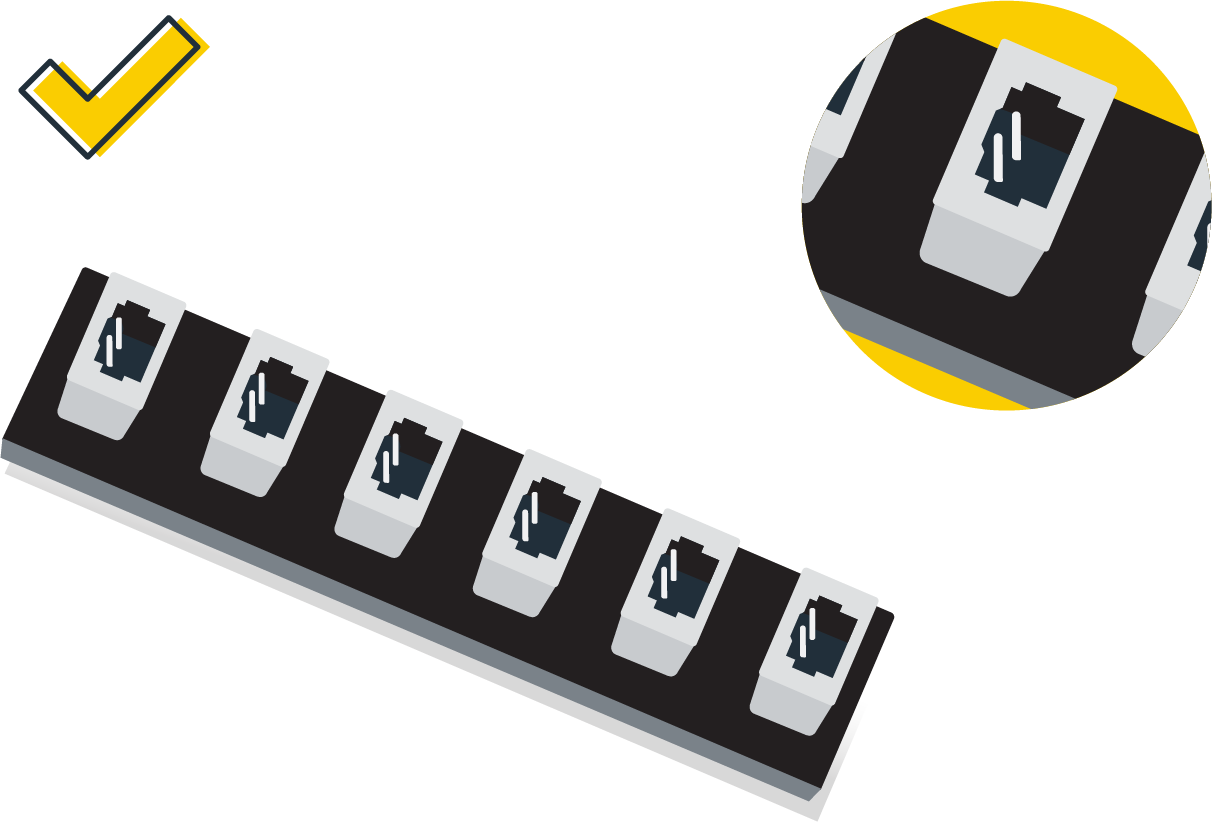
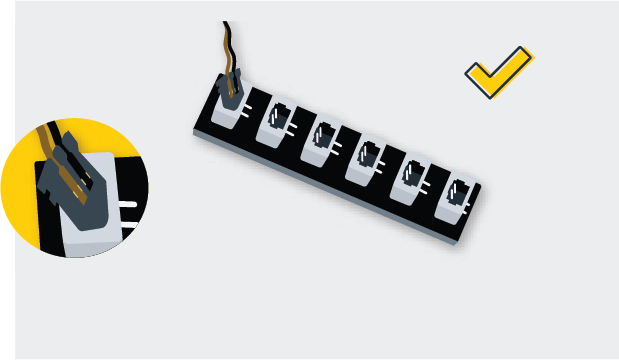
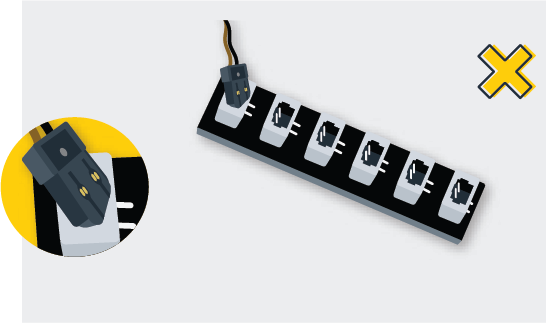
CHECK YOUR EXPANSION BOARD PORTS/ STRIP LIGHT PORTS / EFFECTS BOARD PORTS
It is important to note that connectors can only be inserted to the expansion board, strip light, or effects board ports in one direction.
Forcibly inserting connectors in the incorrect direction will result in damaging the pins inside each of the ports on your component board.
Correct Insertion
Incorrect Insertion
Not only will a light connected to the damaged port not work, but if the pins inside the port are bent to a point they are touching each other, this can result in all other lights in the system to stop working. This is a short circuit.
A short circuit can also result in overheating of the board, cable or batteries. If you suspect a short circuit, DISCONNECT POWER IMMEDIATELY. Batteries can fail, catch fire, or even explode if left connected to a short circuit for too long.
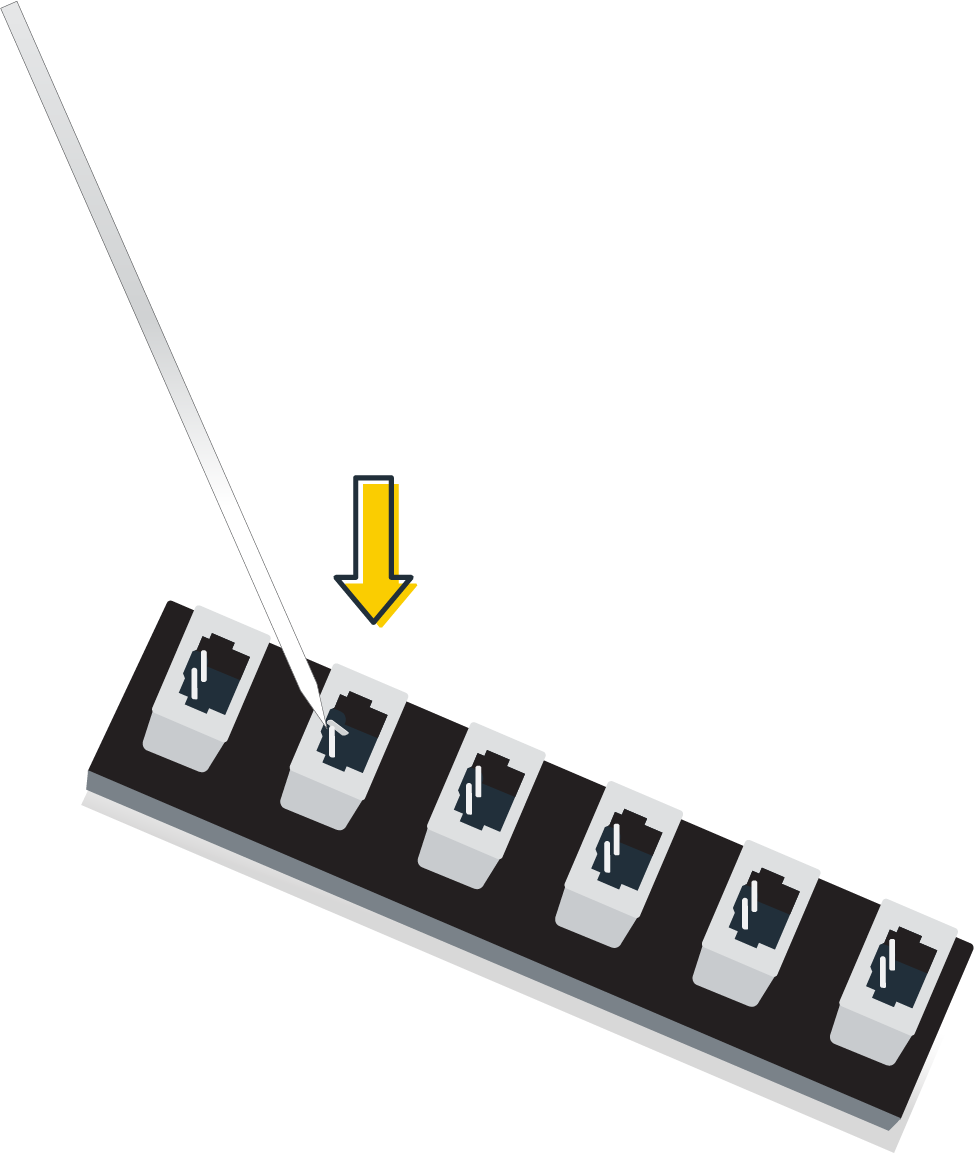
If you suspect you have a faulty component due to a bent pin, try the following steps:
If you look carefully inside each of the ports, each port contains 2 small pins that should be straight. You will be able to identify a faulty port if it has any bent pins.
Bent Expansion Board Pin

To fix the faulty port, you will need a sharp thin object such as a needle or a pair of tweezers. Simply use the object to bend the pin back in line. Once the pins are straight, the expansion board should function correctly.
Using an instrument
Fixed bent pin