Just as hype for The Mandalorian Season 2 begins to build, LEGO goes ahead and releases another set from the popular Star Wars series, and we are definitely here for it.

Up until recently with the UCS A-Wing release a couple of months ago, it had been a bit quiet in the Light My Bricks head quarters in terms of Star Wars sets. So you can imagine how excited we were when LEGO announced the bounty hunter’s ship - The Razor Crest!

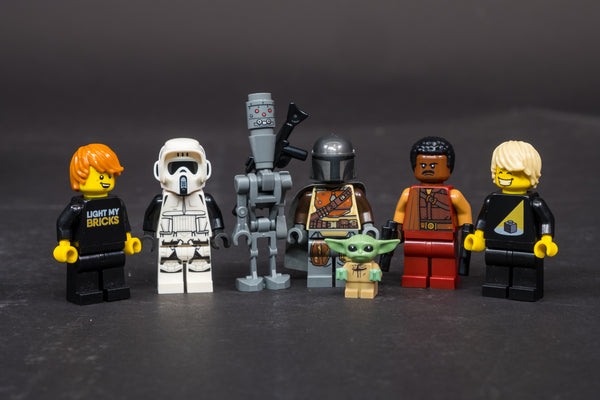
While other recent Star Wars releases have been on the lighter side in terms of piece count, the Razor Crest features an extremely solid and robust build, measuring 38cm in length and clocking in at 1023 bricks. Not bad at all! This is a really great build experience for fans who enjoy a great spacecraft, but perhaps do not have the budget for each UCS release that hits the market. The Razor Crest is chock full of detail and interesting features, including 5 (or perhaps 4.5!) great mini figures. Yes, with this set’s mini figures it’s all about the Baby Yoda, so small it connects to a single LEGO stud! Don’t lose it… make sure the child is safe.

We think perhaps a good comparison in terms of detail, features, complexity and value for money is the Tantive IV build. Both have similar age recommendations, piece counts under the 2000 mark and both feature the popular spring loaded torpedoes.
As previously mentioned, this was one of the most enjoyable builds we’ve experienced in a long time - and we LOVE building LEGO! So that’s quite a statement right there. Hyperbole aside, the Razor Crest is really a very satisfying, solid construction. There’s no flimsiness or perceived weak points and as you progress you really get a sense of the strength the ship holds. It seems to be as strong as Beskar armour. Makes it great for display and for handling. All up it took us about 3 hours to assemble.


Once the build was complete and we’d taken a moment to admire our handiwork, it was time to do what we do best - capture fugitives hiding in far off star systems for a bounty… I mean light LEGO sets. Same thing more or less. We have spoken.

This set was a pleasure to light. Traditional and straight forward in some aspects, while just enough unique details and design challenges to keep things interesting, without over complicating it.
Early on we saw an opportunity to utilise the NC Push Board with the kit, which is normally reserved for Technic’s auto range. The NC Push Board is made up of a tiny circuit board measuring 10mm x 10mm (such a large bounty for such a small package!), featuring both and IN and OUT ports and of course, a push trigger. When connected to power via the IN port, once the trigger is engaged or pushed in, it will cut power to whichever lights are connected to its OUT port. This makes it perfect for emulating vehicle interior lighting effects, why not use it for the Razor’s access ramps?

The first attempt saw us approach the most obvious option in the rear opening, but the proved not ideal as there was not enough surface area to comfortably adhere the board to. That’s the thing with the NC Push Board, it needs to be positioned juu-ust right to ensure the trigger can be comfortably engaged.
Our push board adventure may have been done with right there, however The Razor Crest has an interesting design where the entire lower deck opens on the rear and starboard sides! We found the smaller hatch towards the front provided the best positioning, allowing the interior lights to turn on, only when the door opens.

Speaking of effects boards, we couldn’t let those awesome twin front canons go unchecked, enter the Gun Effects Board. While the spring loaded interactivity of the torpedos mean we have to leave them out of the design process (not before firing them at each other a few times though), this wasn’t the end of the world due to the concealed way the torpedos are housed. With this in mind we knew it was important to really make the most of those remaining visible weapons!

Next up were perhaps the most obvious features to light, the Razor Crest’s huge iconic jets! In terms of hull to jet ratio, these bad boys make up an enormous percentage of the overall craft, so we figured what was needed was a pair of our Large Bit Lights. Once connected to a standard Light My Bricks Flicker Board, these oversized lights really emphasise the rumble and glow of the ships oversized source of propulsion.


Finally it was time to light the cockpit, where Mando would spend most of his time. This was a challenge as we wanted to be as true to the source material as possible, while highlighting a focal point of the model. Fierce debate ensued within the walls of LMB HQ’s design studio, to keep the cock pit dark and moody to best reflect how it appears on screen? Or take some creative license and bump up that moody LED glow cast on Mando’s Beskar armour by the starships many displays, dials, meters and monitors? While we’re all fans and sticklers for canon, we couldn’t help but insert some of our Cool White Bit Lights to really highlight how cool this model is and while it might appear a little brighter and in the series, we think you’ll all be pleased with the result!


Wow, we are officially hyped for the new season of The Mandalorian! What other builds from the series do you hope to see in LEGO form? Perhaps even a UCS version of the Razor Crest? For us here in LMBHQ, you know if LEGO release a Star Wars UCS kit, we automatically pick it up and light it. This is the way.

